Summer Tomato Sandwich

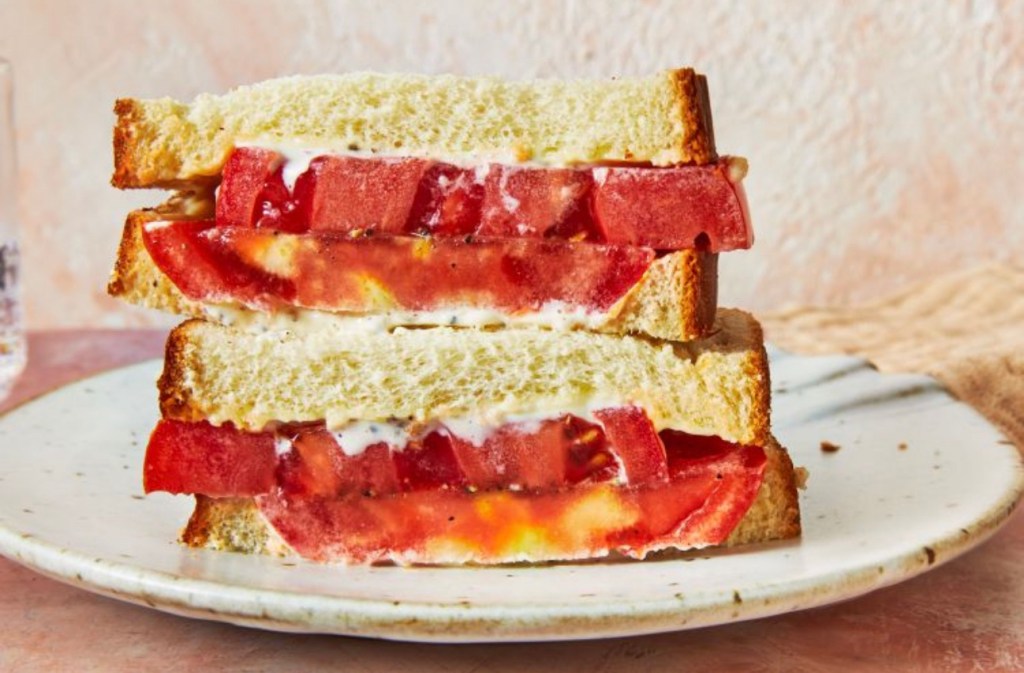
When garden tomatoes are at their juiciest, this classic eat-it-over-the-sink sandwich—with its mayo-gilded drips—is a must.

★★★★★

Sandwich, TRIED & TRUE

Prep Time: 5 mins Cook Time: 5 mins Servings: Source: southernliving.com

INGREDIENTS

2 (1/2-inch-thick) slices beefsteak tomato

1/4 tsp. kosher salt or 1/8 tsp. table salt

1/4 tsp. freshly, coarsely ground black pepper

2 slices white sandwich bread

3 Tbsp. mayonnaise (homemade or Dukes)

DIRECTIONS

Prepare tomato slices:

Arrange tomato slices on a paper towel; sprinkle evenly with salt and pepper. Let stand until tops of slices are beaded up with juices, 3 to 5 minutes.

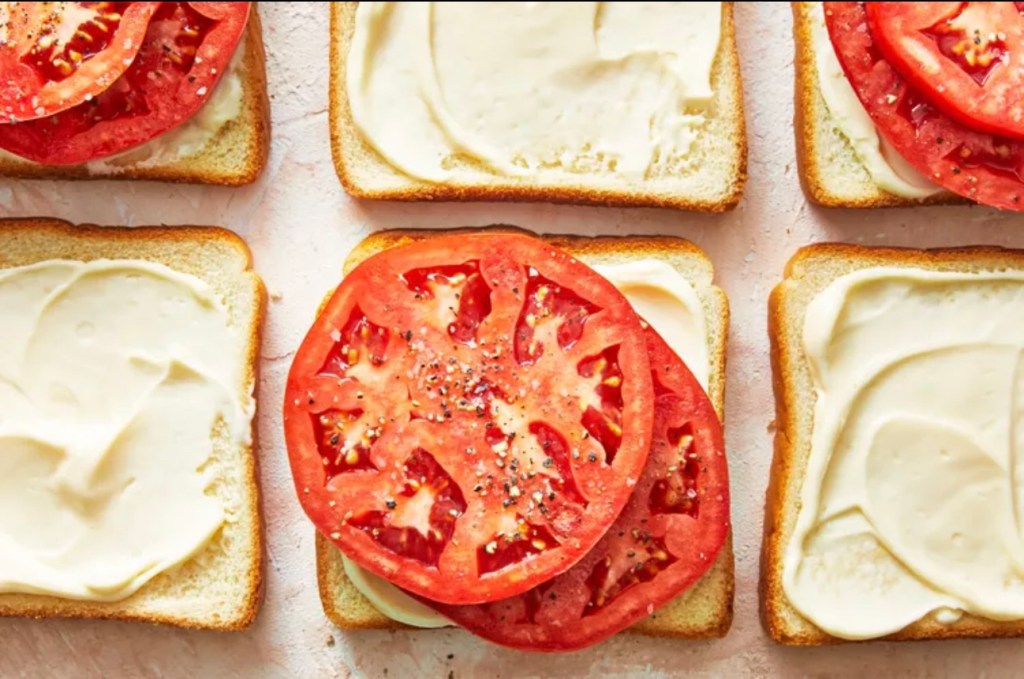
Spread one side of each bread slice with 1 1/2 tablespoons mayonnaise.

Arrange tomato slices on mayo side of one bread slice; top with other bread slice, mayo slice down. Enjoy immediately.

It’s probably safe to say that most Southerners with tomatoes in their garden (or with generous friends who grow tomatoes) mark the official beginning of summer with their first tomato sandwich. It’s a delicious kickoff to a season of produce goodness, a ritual enjoyed often and with great enthusiasm while tomatoes are at their peak. It’s one of the simplest sandwiches you can make, and to enjoy a true taste of summer in the South, you really do need to keep it simple.

Of course, there are embellishments you can add if you want (more about that later), but the basic formula of soft white bread, mayonnaise, tomatoes, salt, and pepper produces a Southern ideal. The bread soaks up the yummy tomato juices, which mingle with the creamy mayo, but it doesn’t get soggy because you eat this yumminess right away, and quickly. The tomato sandwich is so irresistible, you might just gobble down two in a row. It’s shockingly easy to do.

What Kind of Tomato Is Best for a Tomato Sandwich? 

The most important thing for a good tomato sandwich is that you start with a fresh beefsteak tomato from the garden or the farmers’ market. You’re not going to get the same sort of intense joy from a grocery store tomato, which typically lacks the same level of juiciness, sweetness, and flavor complexity.

Beefsteak tomatoes are the big guys, the ones you might sometimes call slicer tomatoes; a slice of this kind of tomato should cover a piece of sandwich bread or a hamburger bun. You can go with heirloom or conventional tomatoes; either type will be delicious.

What Kind of Bread Is Best for a Tomato Sandwich? 

Soft white bread is what you want here. Baguettes and artisanal boules are beautiful loaves, and whole-grain bread is downright delicious, but they’re not right for this a tomato sandwich. Squishy white bread from the bread aisle, not the bakery section, is the right choice. The softness marries perfectly with the juicy-meaty texture of the tomatoes, so preferably leave the bread untoasted.

Note that some white sandwich bread is very sweet (from lots of added sugar), so for the best flavor—bread that truly complements the tomatoes—look for brands such as Sara Lee, which contains just two grams of added sugar per serving.

What Is the Best Mayonnaise for a Tomato Sandwich? 

If you really want to go for the most luxe, top-notch experience, try making your own homemade Mayo. (It’s easier than you think, and it tastes fantastic.) Short of that, Duke’s gets the gold star for its supreme creaminess and balanced flavor with a hint of tang and loads of savory richness.

Our Top Tip for the Best Southern Tomato Sandwich 

With something this simple, quality ingredients are of course key. We’ve already discussed those crucial garden tomatoes, the best bread, and the right mayo. To make all of those elements come together in perfect harmony, you need to season the tomatoes to enhance their flavor and juiciness.

We recommend placing the slices on a paper towel, sprinkling with generous amounts of kosher salt and coarsely ground black pepper, and letting them hang out for 3 to 5 minutes. Some of the juices will soak into the paper towel, but don’t worry—there will still be plenty to run down to your elbow as you take a bite. That brief hang time allows the seasonings to permeate the tomato (making it taste like tomato to the 10th degree) and really gets the juices going.

Possible Embellishments for a Tomato Sandwich 

Trust us: The simple tomato sandwich recipe below is a thing of beauty, the sandwich you’ll crave all your life.

If you want a little more oomph, however, you can try adding some very thinly sliced Vidalia onion for crunch and additional savory notes. You can even soak that shaved onion in cider vinegar for a minute for a puckery pickled onion effect. Or chop some basil and stir it into your mayo for an herbal punch.

In place of kosher salt, you could try smoked salt, seasoned salt, or garlic salt, and you could replace the black pepper with crushed red pepper flakes.

Hawaiian Bread from your Bread Machine

Bread Machine Hawaiian Bread

Bread Machine, BREAD MAKER, Breads
Prep Time: 2 hrs 45 mins | Cook Time: 12 mins | Servings: Servings 20 rolls

Ingredients:
⅓ cup pineapple juice – 76 gr (or water or milk)
½ cup mashed potatoes – 125 gr
2 tablespoons nonfat dried milk powder – 14 gr (or use milk instead of pineapple juice and leave the milk powder out)
1 large egg – 50 gr
1 egg yolk – 14 gr
3 tablespoons sugar – 36 gr
⅓ cup heavy cream – (80 gr)
¼ cup butter – chopped (57 gr)
1 tablespoon honey – 21 gr
1 teaspoon salt – 6 gr
¼ teaspoon ground ginger
½ teaspoon cake batter-extract – 2.5 gr
3 cups unbleached all-purpose flour – 360 gr
2 teaspoons bread machine yeast – 6 gr
Glaze
1 egg yolk – 14 gr
1 tablespoon milk – 14 gr

Directions:
Making the dough:
Combine all of the dough ingredients into the bread machine pan in the order given. Select the DOUGH cycle and push the START button.


Open the lid after a minute and check to ensure the paddles are engaged and working correctly. The dough should start to clump.


If the dough looks like pancake batter or is dry and crumbly, you may have inadvertently mismeasured an ingredient, or perhaps there is a mistake in the recipe. Add flour, one tablespoon at a time, if the dough is too wet, or liquid if the dough is too dry (wait a couple of minutes between each addition).
Recheck your dough again after 15-18 minutes. The dough should stick to the sides, then pull away cleanly. See the video to watch this in action. Note how shiny and elastic the dough is.


When the dough cycle completes and the dough has risen to double, remove dough from the bread machine pan to a floured surface. (I use a silicone mat so I can throw it in the dishwasher.)
Shaping the dough for rolls:
Spray two 7 or 8-inch, square or round pans with an aerosol oil/flour mixture like Baker’s Joy.
Form dough into a large ball. Divide in half. Divide each half into 10 portions and form each portion into a ball.
Place 10 balls into each pan. Cover pans with a tea towel and find a warm place for the rolls to rise again.
About 15 minutes before rolls are ready to bake, preheat oven to 375 degrees.
Let dough balls rise until about half again their original size. If you let them get too big during this rising, they will be dry.
Glaze
Whisk egg yolk and milk together in a small bowl. Use a silicone brush to carefully coat unbaked rolls (don’t let it drip) before you place them into the oven.
Baking Rolls
Place rack in a low position in your oven. Bake rolls at 375˚F for 13-15 minutes or until golden brown. You don’t want them to be doughy, but if you bake them too long, they will be dry and lose the soft texture you expect in Hawaiian bread.
After cooling an hour or two, place rolls into a plastic bag to keep the crust soft.

Notes:
Variation:

  1. Knead a cup of raisins or other dried fruit into the bread dough after removing it from the bread machine for a fabulous variation.
  2. If you want a round loaf, divide the dough into three parts. Use two parts to make a round loaf. The remaining dough is good for rolls. In case you’re wondering why not make a bigger loaf with all the dough: My experience says it’s difficult to get a whole loaf of that size to bake all the way through without drying out the loaf on the edges.
    Directions for making bread with a stand mixer or by hand:
    To make this recipe in a heavy-duty stand mixer: Add ingredients to the bowl in the same order.
  3. Turn on LOW to mix until all ingredients are moistened. Then, using a dough hook, turn the speed to 2 or 3. Continue beating/kneading until dough becomes smooth and elastic (about 5-10 minutes). Cover and allow to rise in a warm place. Deflate dough gently and shape as indicated in the recipe.

  4. If making by hand: Combine all ingredients into a shaggy ball in a large bowl. Turn dough out onto a floured surface. Knead with your hands until the dough becomes smooth and elastic. Kneading will likely take 10-20 minutes, depending on your experience. Place the dough ball into a greased bowl. Cover and allow to rise until double. Deflate the dough gently and shape as indicated in the recipe.
    Please note: If you only have active dry yeast, use 1/4 teaspoon more than called for in the recipe. It no longer needs to be dissolved first, but you can if you prefer.

Nutrition:
Calories 133 kcal
Serving: 1roll | Calories: 133kcal | Carbohydrates: 20g | Protein: 3g | Fat: 5g | Saturated Fat: 3g | Polyunsaturated Fat: 1g | Monounsaturated Fat: 1g | Trans Fat: 1g | Cholesterol: 30mg | Sodium: 148mg | Potassium: 75mg | Fiber: 1g | Sugar: 4g | Vitamin A: 171IU | Vitamin C: 2mg | Calcium: 19mg | Iron: 1mg

Source: https://saladinajar.com/recipes/sweet-hawaiian-style-rolls-mixed-in-a-bread-machine/#comments