Prep Time: 15 mins Cook Time: 15 to 18 mins Servings: 12 doughnuts Source: kingarthurbaking.com
INGREDIENTS
Doughnuts
1/3 cup (67g) vegetable oil
3 large eggs
1 1/4 cups (248g) granulated sugar
1 cup (255g) applesauce, unsweetened preferred
1/4 cup (85g) boiled cider, or 6 tablespoons (85g) additional applesauce
1 1/2 teaspoons King Arthur Pure Vanilla Extract
1 teaspoon cinnamon
1 teaspoon salt
1 1/2 teaspoons baking powder
2 cups (240g) King Arthur Unbleached All-Purpose Flour
2 tablespoons (25g) cinnamon sugar
Maple glaze
1 1/2 cups (170g) confectioners’ sugar
3 tablespoons (64g) maple syrup*
3/4 teaspoon maple flavor, optional; for enhanced flavor
pinch of salt
2 teaspoons milk or 1 tablespoon heavy cream, enough to make a spreadable glaze
DIRECTIONS
Preheat the oven to 350°F. Lightly grease two standard doughnut pans. If you don’t have doughnut pans, you can bake these in a standard muffin tin; they just won’t be doughnuts.
Beat together the oil, eggs, sugar, applesauce, boiled cider, vanilla, cinnamon, salt, and baking powder until smooth.
Add the flour, stirring just until smooth.
Fill the wells of the doughnut pans nearly to the rim; use about 1/4 cup of batter in each well. If you’re making muffins, fill each well about 3/4 full; the recipe makes about 15, so you’ll need to bake in two batches (unless you have two muffin pans).
Bake the doughnuts for 15 to 18 minutes, or until a cake tester inserted into the center of one comes out clean. If you’re making muffins, they’ll need to bake for 23 to 25 minutes.
Remove the doughnuts from the oven, and loosen their edges. After about 5 minutes, transfer them to a rack.
While the doughnuts are still warm (but no longer fragile), gently shake them, 1 or 2 at a time, in a bag with the cinnamon sugar. If you’ve made muffins, sprinkle their tops with sugar. Allow the doughnuts or muffins to cool completely before glazing.
To make the glaze: Mix together all of the glaze ingredients, stirring until smooth.
Spread the doughnuts with glaze (or dip tops in glaze); return to the rack until the glaze is set.
Tips from our Bakers
To make apple cider glaze: Follow the maple glaze instructions, substituting boiled cider for the maple syrup, increasing the sugar by 1/4 cup, and omitting the maple flavor.
Prep Time: 15 mins Cook Time: 4 hrs 30 mins Servings: Yield: 6 servingsSource: skinnytaste.com
INGREDIENTS
1 lb boneless skinless chicken thighs , or chicken breast
1 teaspoon avocado oil , or olive oil
1/2 medium onion, chopped
2 garlic cloves, finely chopped
1 teaspoon ground cumin
1 teaspoon kosher salt
2 cups homemade enchilada sauce, or 16 ounce jarred
1/4 cup sour cream, plus more for serving
4 corn tortillas, cut into strips
15 ounce can low-sodium black beans, rinsed and drained
4 ounces shredded cheese, such as a Mexican cheese blend, Monterey Jack, or mozzarella (about 1 cup)
sliced jalapeño peppers , and chopped fresh cilantro, for topping
optional for topping and serving:
sliced avocado
crema or sour cream
cilantro lime rice
DIRECTIONS
Heat the oil in a skillet over medium heat. Add the onion, garlic, cumin, and salt and cook, stirring, until the onion has softened and browned, about 5 minutes.
Transfer to the slow cooker and add the enchilada sauce, sour cream, and 1/4 cup water to the onion mixture and stir to combine. Fold in the beans until thoroughly coated.
Nestle the chicken in.
Cover and cook on high for about 3 to 4 hours or high low for about 6 to 7, until chicken is tender and cooked through. Shred the chicken in the pot with 2 forks.
Add the tortilla strips and stir, then top with the cheese, cover the slow cooker, and cook 30 minutes or until the cheese has melted.
Once the cheese is melted, garnish with cilantro, jalapenos, and optional toppings.
Serve over rice if desired and top with optional sour cream, and avocado.
NOTES
If using chicken breast, the WW Points are 5 pts instead of 7.
Refrigerated for 4 days in an airtight container. You can also freeze it for up to 3 months and reheat it in the microwave.
To make this in the pressure cooker or Instant Pot: follow steps 1 to 4, cook high pressure 20 minutes, natural release. Shred chicken, add tortillas, stir in. Top with cheese and cook high pressure 5 to 10 minutes, quick release.
1 (28-ounce) can crushed tomatoes, preferably San Marzano
Large pinch of saffron threads
Kosher salt and freshly ground black pepper
1/2 cup orzo
1/2 cup heavy cream
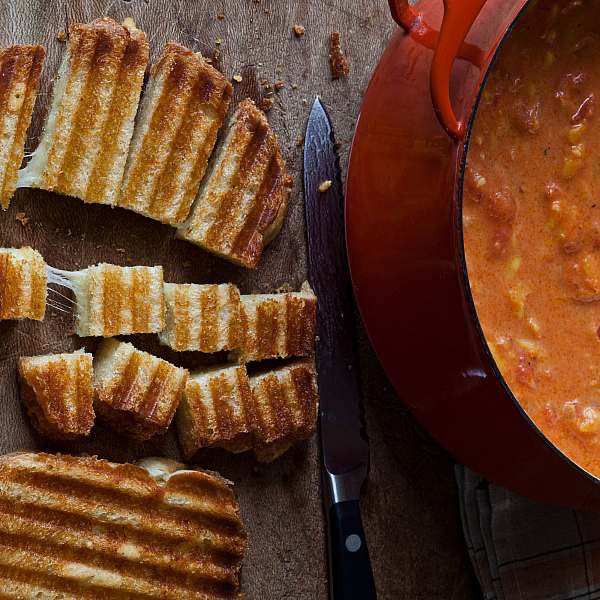
Grilled Cheese Croutons (recipe below)
Directions
In a large pot or Dutch oven such as Le Creuset, heat the olive oil over medium heat. Add the onions and cook over medium-low heat for 15 minutes, stirring occasionally, until golden brown. Add the garlic and cook for 1 more minute. Stir in the chicken stock, tomatoes, saffron, 1 tablespoon salt, and 1 teaspoon pepper. Bring the soup to a boil, then lower the heat and simmer for 15 minutes.
Meanwhile, fill a medium pot with water, add 2 teaspoons salt, and bring to a boil. Add the orzo and cook for 7 minutes. (It will -finish cooking in the soup.) Drain the orzo and add it to the soup. Stir in the cream, return the soup to a simmer, and cook for 10 more minutes, stirring frequently.
Serve hot with Grilled Cheese Croutons scattered on top.
Grilled Cheese Croutons (Serves 4 to 6)
4 (½-inch-thick) slices country white bread
2 tablespoons unsalted butter, melted
4 ounces Gruyère cheese, grated
Heat a panini grill. Place the four slices of bread on a cutting board and brush lightly with the melted butter, being sure to butter the corners. Turn the slices over and pile Gruyère on two of the slices. Place the remaining two slices of bread on top of the Gruyère, -buttered sides up.
Grill the sandwiches on the panini grill for about 5 minutes, until nicely browned. Place on a cutting board, allow to rest for 1 minute, and cut into 1-inch cubes.
If you’re like me, you only eat fresh grape and cherry tomatoes when they’re in-season, vine ripened, and just picked. Compare the bright flavor of summertime tomatoes to the anemic taste of off-season hothouse tomatoes and there’s no contest! Want to preserve their incredible taste? Consider dehydrating them!
Dehydrating grape and cherry tomatoes creates an intense burst of flavor and color. If you grow your own garden I suggest planting extra grape tomatoes and/or cherries just for this purpose. If you don’t have your own bumper crop, see if a local farm or market will sell you them in quantity at a discount.
Dehydrating Grape and Cherry Tomatoes
“Moist-Dry” versus “Leathery-Dry”
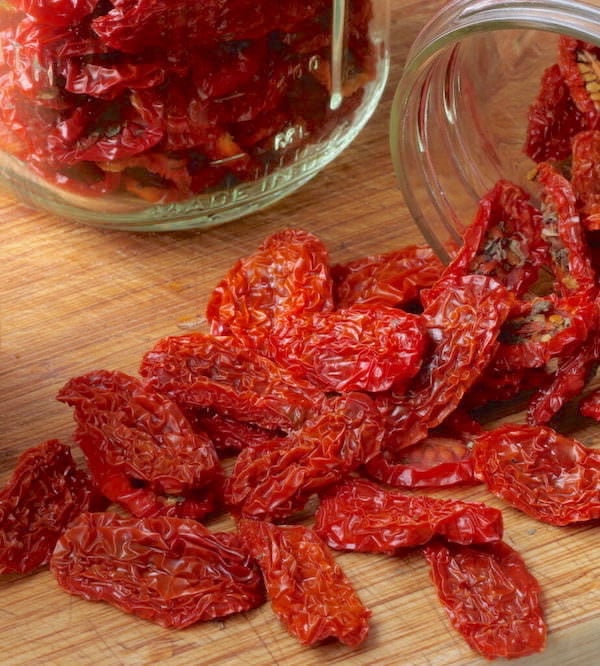
I prefer dehydrating grape and cherry tomatoes until they are almost dry; I store these moist gems in the freezer. Dry completely if you prefer to store them in your pantry, otherwise they’ll grow mold.
Drying Tomatoes in a Dehydrator
Method Overview
Wash grape or cherry tomatoes Cut them in half Arrange on trays Dehydrate between 125ºF – 135ºF Check and rotate trays periodically
Wash the tomatoes and drain well.
Slice each tomato in half lengthwise.
Arrange the halved tomatoes on your dehydrator trays with the skins facing down. This will prevent the juices from dripping. Leave a bit of space between each tomato so they are not touching. Sprinkle with oregano and sea salt if desired.
Put the trays in your dehydrator and turn it on. If it has a thermostat, set it between 125º to 135º.
It will take 10 to 12 hours for the tomatoes to become “moist dry” and will take 12 to 14 hours to become “leathery dry.” These are approximate times. Periodically check the tomatoes for doneness, and rotate the trays. Even if your dehydrator has a fan, rotating the trays will help them become more evenly dried.
Once dried to your preference, let the tomatoes cool down. Place them in an airtight glass jar with a screw lid; label with the date.
Leave the jar at room temperature for 24 hours so the moisture content of the tomatoes will become more evenly distributed. This process is called “conditioning”.
Store moist-dry tomatoes in the freezer. Store leathery-dry tomatoes in a cool, dark, dry location.
Hard to eat just one so resist if you can!
FAQs
How long does it take to dehydrate grape and cherry tomatoes? In general, it takes somewhere between 10 to 14 hours for halved grape and cherry tomatoes to dehydrate. The actual time will depend on several factors, such as: • temperature of the dehydrator • humidity in the room • whether the dehydrator has a circulating fan or not to keep the heat evenly distributed • how often the dehydrator is opened, and if it opens from the top or side • size and moisture content of the tomatoes • whether you are drying until moist-dry or leathery-dry
How to use dried tomatoes? • We enjoy eating moist-dried tomatoes right out of the jar for a burst-of-tomato snack. We also add them to various salads, wraps, stuffings, and more. Many Italian recipes call for sautéing garlic in olive oil. Consider slicing moist-dried tomatoes into ribbons, then adding them to the pan during that step. They are especially delicious in hot or cold pasta dishes that call for a pesto or olive oil dressing. Even just a bit of these gems adds a welcome bursts of flavor – there’s no need to overdo it. • Soak leathery-dried tomatoes in a small amount of warm water until they are softened. Once they’re softened, slice into ribbons (or use as is) in various dishes as described above. You can add the tomato infused soaking water to your dish too.
How long do dehydrated tomatoes last? Technically, if kept in an airtight container, moist-dry tomatoes will last indefinitely in the freezer and leathery-dry tomatoes will last indefinitely in a dark, dry, cool location. The longer they are stored; however, the more nutrients will be lost. So try to use them within a year.
How to make tomato powder and what is it used for?
If you have a grinder or a high speed blender, tomato powder can be made from leathery-dried tomatoes following these three easy steps.
Freeze leathery-dried tomatoes before grinding or blending them into powder. Transfer them to your grinder or high-speed blender and immediately process using the highest speed. Blend while the tomatoes are still frozen for best results. They thaw fast, so work quickly. Put the powder into a glass jar with a tight fitting lid and store in a dark, dry, cool location. As you can imagine, tomato powder packs a tomato punch. It can be added to soups, sprinkled on anemic tomatoes (to boost their flavor), sauces, and more.
You can also use this powder to make tomato paste. Simply combine two parts powder to one part water and voila, you have tomato paste!
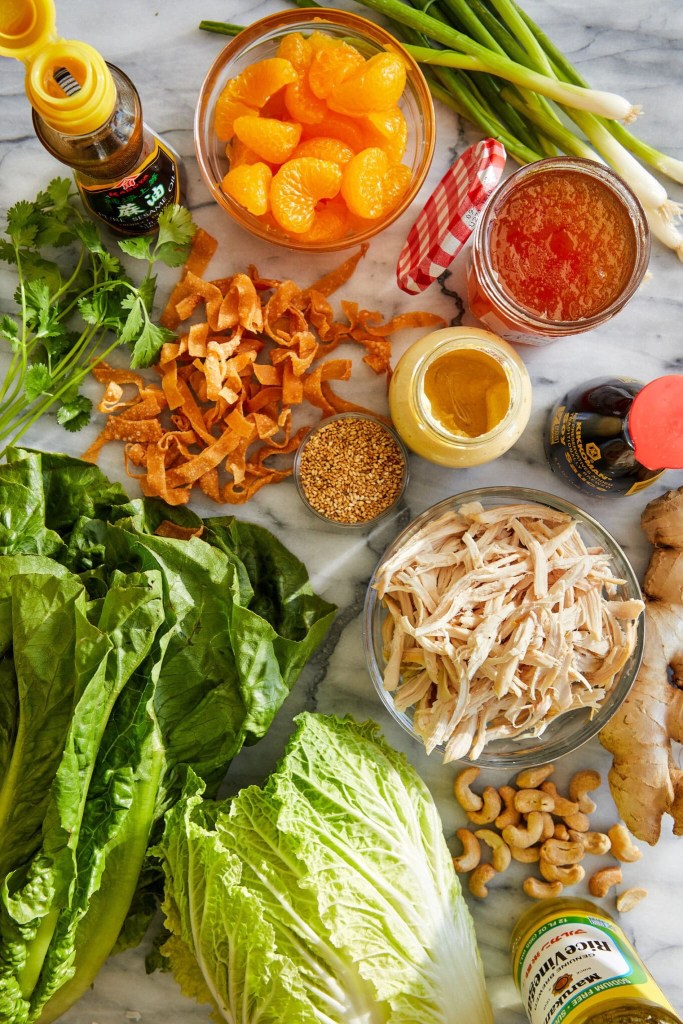
Made with leftover rotisserie chicken, romaine, napa, crispy wonton strips and the best sesame ginger dressing ever!
4.8 stars (12 ratings)
INGREDIENTS
1 head romaine, shredded
4 cups shredded napa cabbage
3 cups leftover shredded rotisserie chicken
1 (15-ounce) can mandarin oranges, drained
½ cup chopped fresh cilantro leaves
½ cup roasted salted cashews
3 green onions, thinly sliced
2 cups crispy wonton strips, homemade or store-bought
2 teaspoons toasted sesame seeds
FOR THE SESAME GINGER DRESSING
¼ cup rice vinegar
3 tablespoons orange marmalade
2 ½ tablespoons canola oil
2 ½ tablespoons toasted sesame oil
1 tablespoon reduced sodium soy sauce
2 teaspoons freshly grated ginger
2 teaspoons toasted sesame seeds
Kosher salt and freshly ground black pepper, to taste
INSTRUCTIONS
To assemble the salad, place romaine lettuce in a large bowl; top with cabbage, chicken, mandarin oranges, cilantro, cashews and green onions. Pour the sesame ginger dressing on top of the salad and gently toss to combine.
Serve immediately, topped with wonton strips and sesame seeds.
FOR THE SESAME GINGER DRESSING
In a small bowl, whisk together rice vinegar, orange marmalade, canola oil, sesame oil, soy sauce, ginger and sesame seeds; season with salt and pepper, to taste.
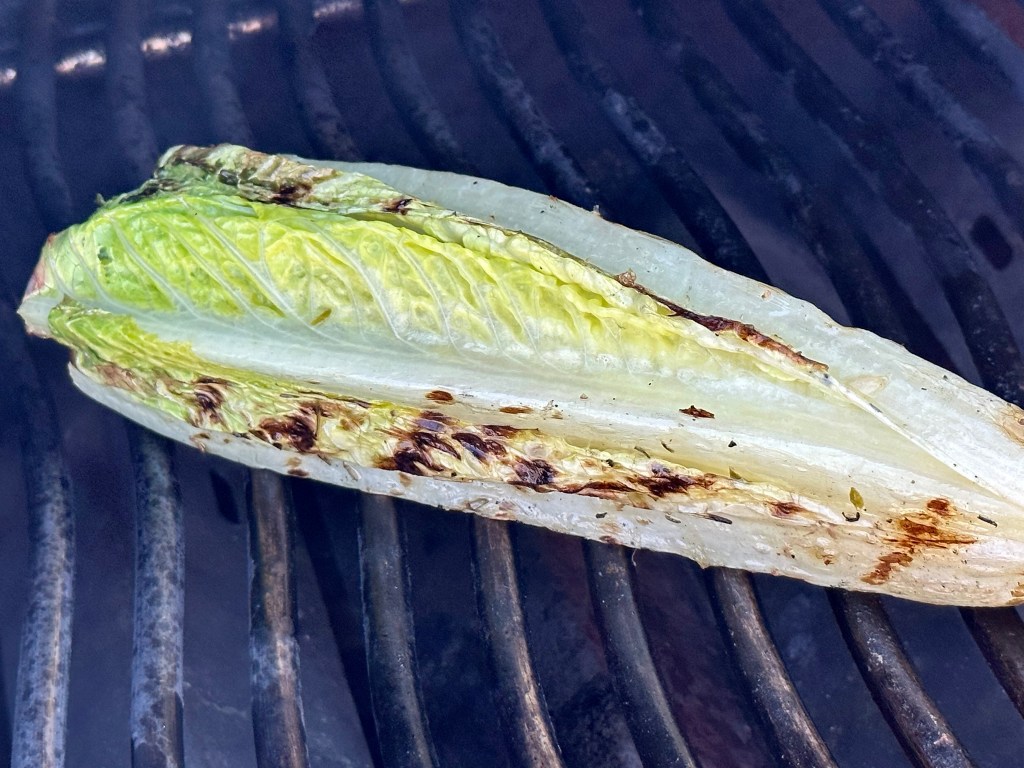
There may come a time in your life when you are forbidden carbs – ANY carb – for a 36 hour period. Unlikely, yes, but that’s what made me recall having grilled romaine.
I’d never tried to make it but desperate times called for desperate measures. Kidding. It’s really delicious. Truly.
Grilled Romaine Lettuce
GRILLED, Healthy, Salads,
Prep Time: 10 mins Cook Time: 10 mins Servings: Servings 3 to 4 servings Source: simplyrecipes.com
INGREDIENTS
3 to 4 romaine hearts
3 tablespoons extra virgin olive oil
1 tablespoon red wine vinegar (or cider vinegar)
2 teaspoons chopped fresh herbs such as rosemary, thyme, oregano (or 1 teaspoon dried mixed herbs)
1/4 teaspoon kosher salt
Pinch freshly ground black pepper
DIRECTIONS
Prep the romaine hearts:
Pull off any old leaves. Chop off the top 1 or 2 inches of the lettuce head, and shave off the browned part of the root end, leaving the root end intact so that the lettuce head stays together.
Prepare your grill:
Turn your gas grill to high or get your charcoal coal grill very hot.
Prepare the vinaigrette:
Put the oil, vinegar, herbs, salt and pepper in a small bowl and whisk with a fork to combine. Paint the lettuce hearts all over with the vinaigrette.
Grill the lettuce:
Grill the romaine hearts until lightly browned on all sides, turning every minute or two until done.
Serve immediately:
Serve immediately. You can either serve the hearts whole, or chop them and toss them for a salad.
NUTRITION
(per serving) 130 Calories 11g Fat 8g Carbs 3g Protein Nutrition Facts Servings: 3 to 4 Amount per serving Calories 130 % Daily Value* Total Fat 11g 14% Saturated Fat 1g 7% Cholesterol 0mg 0% Sodium 98mg 4% Total Carbohydrate 8g 3% Dietary Fiber 5g 17% Total Sugars 3g Protein 3g Vitamin C 9mg 47% Calcium 78mg 6% Iron 2mg 13% Potassium 572mg 12% *The % Daily Value (DV) tells you how much a nutrient in a food serving contributes to a daily diet. 2,000 calories a day is used for general nutrition advice.
For the Pho Stock: Add the beef base and 1 quart water to a 2-quart (1.9-L) saucepan and bring to a low boil. Add the fish sauce, sugar, ginger, onion and salt to the stock and reduce the heat to a simmer. Wrap the cloves, star anise and cinnamon stick in a piece of cheesecloth and tie it into a satchel. Add the satchel to the broth and simmer for at least 30 minutes, but no more than 45 minutes.
Around the 30 minute mark, taste the broth to see that the spice flavors have been extracted, and adjust seasonings if necessary. Strain the aromatics and satchel from the broth, return to a sauce pot, and reserve for assembly.
For the assembly: Bring the broth back to a simmer. In a separate pot, bring water to a boil. Using a sieve or basket, quickly dip the noodles into the water until they are hot and al dente, 10 to 20 seconds. Drain the excess water from the noodles and distribute the noodles between 4 bowls.
Top each bowl with some sliced beef, basil, bean sprouts, cilantro, jalapeno, scallions and onion, or as each person wishes. Ladle in enough broth to cover the ingredients in the bowl. Garnish with a lime wedge. I like to serve pho with Sriracha and hoisin sauce.
Cook Time: 50 minutesServings: Prep time 10 minutesSource: tastesoflizzyt.com
INGREDIENTS
FOR THE BREAD:
3/4 cup granulated sugar
1/2 cup milk
1/2 cup oil
1 large egg
1 teaspoon vanilla extract or almond extract
2 cups all-purpose flour
2 teaspoons baking powder** (see notes)
1/4 teaspoon salt
2 cups diced strawberries
2 tablespoons all-purpose flour
FOR THE GLAZE:
2 cups powdered sugar
2 tablespoons melted butter
1/3 cup finely diced strawberries
1/2 teaspoon vanilla extract or almond extract
1-2 tablespoons heavy cream or milk** (optional)
DIRECTIONS
Preheat the oven to 350 degrees.
In a medium bowl, stir together the sugar, milk, oil, egg and vanilla. In a separate bowl, combine the flour, baking powder and salt. Add the dry ingredients to the wet ingredients and stir until just combined.
In a small bowl, toss together the strawberries and the 2 tablespoons of flour to coat the strawberries. Fold the floured strawberries gently into the batter.
Pour the bread batter into a greased 9″x5″ bread pan. Bake at 350 degrees for 50-55 minutes. A toothpick inserted in the center of the bread should come out clean. Allow the bread to cool for 10 minutes, then remove the bread to a wire rack to cool completely.
To make the glaze, combine the powdered sugar, melted butter, diced strawberries and extract in a small bowl. Mix until it is smooth.
Once the bread is cool, spread the glaze on top of the bread. Slice and serve.
NOTES
*I often add an extra teaspoon of vanilla or almond extract to the bread batter (along with the wet ingredients) for an extra boost of flavor. I do this especially if I’m not putting the glaze on top. The bread has the most flavor when you add the strawberry glaze!
*We have added up to 2 ½ cups of diced strawberries to the batter. The bread stays together the best when you use about 2 cups.
**We like the strawberry bread as written, but if you’d like a higher rise on the bread, reduce the baking powder to 1 teaspoon and add ½ teaspoon of baking soda. This will change the texture slightly, but some like it a little better.
**We didn’t need any milk or cream to make the glaze spreadable, but it may depend on the juiciness of your strawberries. The glaze will be very thick and look like it is not mixing up, but if you keep mixing, it should create a nice creamy pink glaze as shown below. If it doesn’t, add milk or heavy cream 1 tablespoon at a time. The glaze will soften as it sits too since the sugar pulls out juices from the strawberries. Keep this in mind when adding milk and don’t add too much!
***Many people find that they can make half of a recipe of glaze and it is plenty. If you don’t like a lot of glaze, halve the ingredients.
****The calories shown are based on the bread being cut into 10 pieces (and all of the frosting used), with 1 serving being 1 slice of bread. Since different brands of ingredients have different nutritional information, the calories shown are just an estimate.
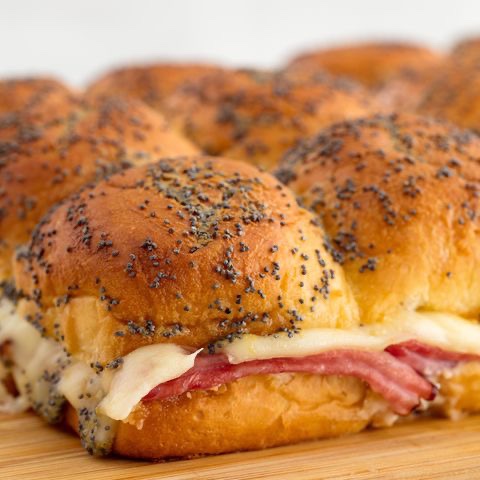
We bought a Honey Baked Ham for the holidays and I went searching for recipes for leftovers.
This one’s a KEEPER.
Ham & Cheese Sliders
Ham & Cheese Sliders
★★★★★
Entertaining for a crowd, Make Ahead, Meats, Sandwich
Prep Time: 5 mins Cook Time: 25 mins Servings: Yields: Source: delish.com
INGREDIENTS
SAVE TO MY RECIPES
1/4 c. yellow mustard
1 tbsp. honey
4 tbsp. melted butter
1 tbsp. poppy seeds
1/4 c. mayonnaise
12 slider buns
12 slices deli ham
12 slices Swiss cheese
DIRECTIONS
Heat oven to 350° and line a large baking sheet with parchment paper. In a small bowl, combine mustard and honey and whisk to combine.
Make poppy dressing: In a medium bowl, combine butter, poppy seeds, and 1 tablespoon of honey-mustard mixture. Whisk to combine.
Split slider buns in half horizontally and place bottom half on baking sheet. Spread mayo in an even layer on the bottom layer of slider buns, then top with an even layer of ham and cheese. Spread top buns with honey-mustard mixture, then place on top of cheese layer. Pour poppyseed dressing on tops of buns (using a pastry brush to spread if necessary) until all buns are coated.
Place in oven and bake until cheese is melty and buns are golden, 10 to 12 minutes. Slice and serve.
NUTRITION
(per serving): 312 calories, 16 g protein, 20 g carbohydrates, .14 g fiber, 6 g sugar, 18 g fat, 8 g saturated fat, 683 mg sodium