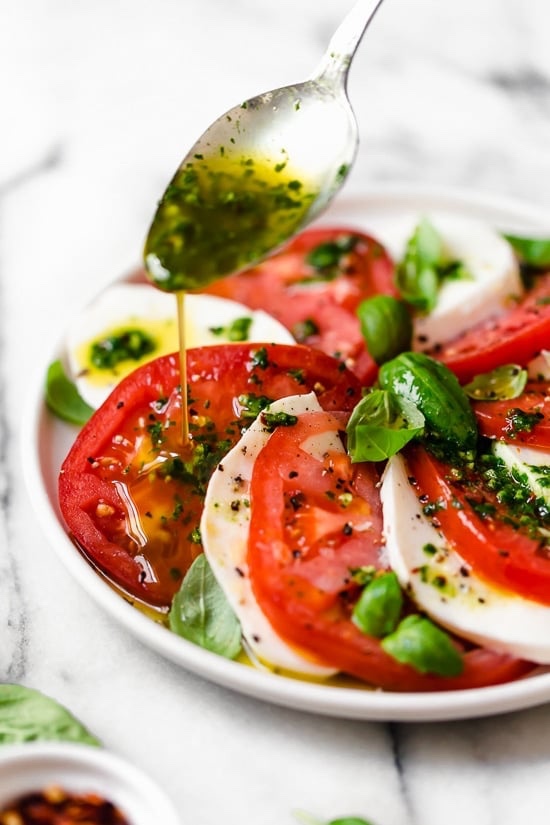
1/2 cup packed fresh basil leaves, stemmed and washed
1/4 cup DeLallo extra virgin olive oil
1 tablespoon water
2 cloves garlic
1/2 teaspoon kosher salt
1/8 teaspoon crushed red pepper flakes
DIRECTIONS
Place the basil, water, garlic, salt and red pepper flakes in a mini-food processor and pulse a few times. Add the olive oil and blend until you have smooth sauce.
Use immediately or refrigerate. Flavors are even more intense the next day. Refrigerate for up to 2 to 3 days.
★★★★★ Quick & Easy, Summer, TRIED & TRUE, Vegetable Prep Time: 10 min Cook Time: 10 min Difficulty: Easy Servings: Yield: 6 to 8 servings Source: foodnetwork.com INGREDIENTS
8 to 10 ears of corn on the cob (yellow or white corn) 3 tablespoons unsalted butter 1 teaspoon kosher salt 1/4 teaspoon freshly ground black pepper DIRECTIONS
Remove the husks and the silk from the corn and cut the kernels off as close to the husk as possible without removing any of the husk. You should have about 7 cups of kernels.
Melt the butter in a large, heavy saute pan. Add the corn, salt, and pepper and saute uncovered on medium-low heat for 8 to 10 minutes, stirring occasionally, until all the starchiness in the corn is gone. Taste, for salt and pepper, and serve.
NOTES
The older the corn, the starchier it becomes. When I’ve had corn from the farmer’s market in my fridge for a few days, I make this recipe. As Ina says in the recipe, 8 to 10 minutes over medium low heat cooks off the starch, leaving only sweetness. It’s fantastic.
Trim the pork tenderloin of any excess fat/silver skin. Coat with a ½ tablespoon olive oil. Rub spice mixture on entire pork tenderloin.
Preheat air fryer to 400° F for 5 minutes. After 5 minutes, carefully place pork tenderloin into air fryer and air fry at 400° F for 20-22 minutes. Internal temp should be 145°F.
When air fryer cycle is complete, carefully remove pork tenderloin to a cutting board and let rest for 5 minutes before slicing. Save any juices to serve over sliced meat.
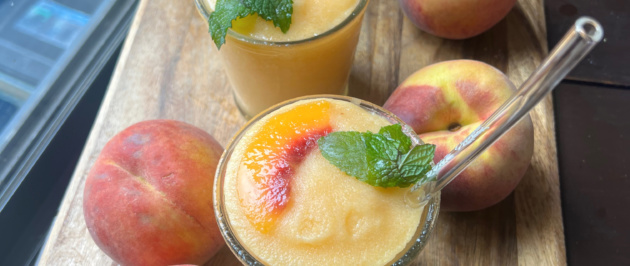
4 Ingredient Frozen Peach Lemonade 🍑🍋 The most refreshing drink to enjoy poolside or after a hot day in the sun. I love making fun lemonades in the summer.
This crustless pizza the ultimate low carb comfort that has all the best parts of a pizza, minus the crust! Cheesy, meaty, and easy to customize, it’s made in just ONE skillet and takes 15 minutes to make.
Start by adding your olive oil into a 12-inch skillet and placing it over medium heat. Once hot, add the garlic and cook until fragrant. Add the ground turkey and use a spatula to break it apart. Cook the ground turkey for 5-6 minutes, until it is no longer pink.
Next, remove the skillet from the heat. Stir through the cheddar cheese and mix until fully incorporated and form the base of the ‘pizza’. Add the pizza sauce, followed by the pizza toppings, then add the mozzarella cheese on top.
Now, bake the crustless pizza for 12-15 minutes, or until the cheese is bubbling on top. Remove the pizza from the oven before slicing and serving it.
Preheat the oven to 200C/400F.
Add the olive oil to a skillet and place it over medium heat. Once hot, add the garlic and cook for a minute. Add the ground turkey and break apart using a rubber spatula. Cook for 4-5 minutes, until no longer pink. Stir through the Italian seasonings.
Remove the skillet off the heat. Stir through the cheddar cheese. Spread the pizza sauce on top, followed by the mushrooms, olives, and pepperoni. Top with the mozzarella cheese.
Place the skillet in the oven and bake the crustless pizza for 10-15 minutes, or until the cheese is bubbly and golden.
Remove the skillet from the oven and slice into four portions and serve immediately.
Prep Time: 15 mins Cook Time: 15 to 18 mins Servings: 12 doughnuts Source: kingarthurbaking.com
INGREDIENTS
Doughnuts
1/3 cup (67g) vegetable oil
3 large eggs
1 1/4 cups (248g) granulated sugar
1 cup (255g) applesauce, unsweetened preferred
1/4 cup (85g) boiled cider, or 6 tablespoons (85g) additional applesauce
1 1/2 teaspoons King Arthur Pure Vanilla Extract
1 teaspoon cinnamon
1 teaspoon salt
1 1/2 teaspoons baking powder
2 cups (240g) King Arthur Unbleached All-Purpose Flour
2 tablespoons (25g) cinnamon sugar
Maple glaze
1 1/2 cups (170g) confectioners’ sugar
3 tablespoons (64g) maple syrup*
3/4 teaspoon maple flavor, optional; for enhanced flavor
pinch of salt
2 teaspoons milk or 1 tablespoon heavy cream, enough to make a spreadable glaze
DIRECTIONS
Preheat the oven to 350°F. Lightly grease two standard doughnut pans. If you don’t have doughnut pans, you can bake these in a standard muffin tin; they just won’t be doughnuts.
Beat together the oil, eggs, sugar, applesauce, boiled cider, vanilla, cinnamon, salt, and baking powder until smooth.
Add the flour, stirring just until smooth.
Fill the wells of the doughnut pans nearly to the rim; use about 1/4 cup of batter in each well. If you’re making muffins, fill each well about 3/4 full; the recipe makes about 15, so you’ll need to bake in two batches (unless you have two muffin pans).
Bake the doughnuts for 15 to 18 minutes, or until a cake tester inserted into the center of one comes out clean. If you’re making muffins, they’ll need to bake for 23 to 25 minutes.
Remove the doughnuts from the oven, and loosen their edges. After about 5 minutes, transfer them to a rack.
While the doughnuts are still warm (but no longer fragile), gently shake them, 1 or 2 at a time, in a bag with the cinnamon sugar. If you’ve made muffins, sprinkle their tops with sugar. Allow the doughnuts or muffins to cool completely before glazing.
To make the glaze: Mix together all of the glaze ingredients, stirring until smooth.
Spread the doughnuts with glaze (or dip tops in glaze); return to the rack until the glaze is set.
Tips from our Bakers
To make apple cider glaze: Follow the maple glaze instructions, substituting boiled cider for the maple syrup, increasing the sugar by 1/4 cup, and omitting the maple flavor.
Prep Time: 15 mins Cook Time: 4 hrs 30 mins Servings: Yield: 6 servingsSource: skinnytaste.com
INGREDIENTS
1 lb boneless skinless chicken thighs , or chicken breast
1 teaspoon avocado oil , or olive oil
1/2 medium onion, chopped
2 garlic cloves, finely chopped
1 teaspoon ground cumin
1 teaspoon kosher salt
2 cups homemade enchilada sauce, or 16 ounce jarred
1/4 cup sour cream, plus more for serving
4 corn tortillas, cut into strips
15 ounce can low-sodium black beans, rinsed and drained
4 ounces shredded cheese, such as a Mexican cheese blend, Monterey Jack, or mozzarella (about 1 cup)
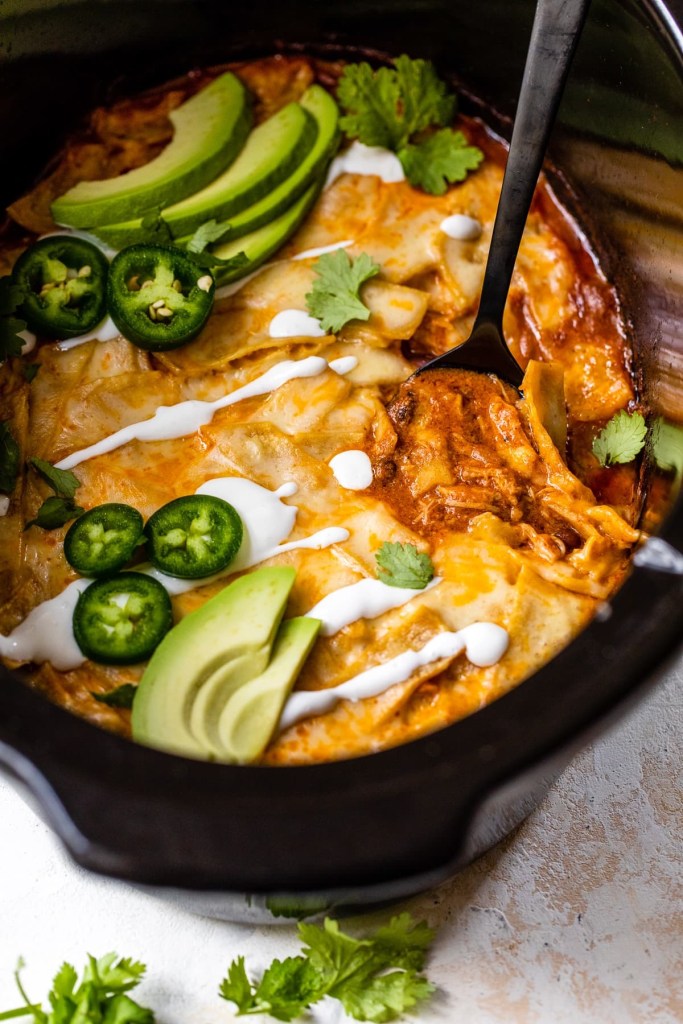
sliced jalapeño peppers , and chopped fresh cilantro, for topping
optional for topping and serving:
sliced avocado
crema or sour cream
cilantro lime rice
DIRECTIONS
Heat the oil in a skillet over medium heat. Add the onion, garlic, cumin, and salt and cook, stirring, until the onion has softened and browned, about 5 minutes.
Transfer to the slow cooker and add the enchilada sauce, sour cream, and 1/4 cup water to the onion mixture and stir to combine. Fold in the beans until thoroughly coated.
Nestle the chicken in.
Cover and cook on high for about 3 to 4 hours or high low for about 6 to 7, until chicken is tender and cooked through. Shred the chicken in the pot with 2 forks.
Add the tortilla strips and stir, then top with the cheese, cover the slow cooker, and cook 30 minutes or until the cheese has melted.
Once the cheese is melted, garnish with cilantro, jalapenos, and optional toppings.
Serve over rice if desired and top with optional sour cream, and avocado.
NOTES
If using chicken breast, the WW Points are 5 pts instead of 7.
Refrigerated for 4 days in an airtight container. You can also freeze it for up to 3 months and reheat it in the microwave.
To make this in the pressure cooker or Instant Pot: follow steps 1 to 4, cook high pressure 20 minutes, natural release. Shred chicken, add tortillas, stir in. Top with cheese and cook high pressure 5 to 10 minutes, quick release.