I had a beautiful green ceramic strawberry pot, with 🍓plants that survived from year to year.
my 🍓decoy
I kept it on our front porch and invited guests to help themselves. There wasn’t much fruit as our summers can be brutally hot, but we thoroughly enjoyed its presence.
Well, it broke early last spring ?? and I hastily planted them into an already established raised garden bed. They took off nicely but I had a LOT of competition for the berries. I couldn’t begrudge the tiny bunnies or the squirrels, but the birds have feeders.
More plants, I thought. More plants and there will be enough strawberries to go around. The runners from the original plants obliged me and I have a nice little patch this year.
But then I saw the birds going after the berries that haven’t even begun to ripen. What to do?🤔
And THAT’s when I thought to paint some small pebbles red like strawberries 🍓. Birds don’t like pecking hard things with their beaks. They’ll peck the rocks and not like it very much and leave my soon-to-be ripe berries alone. Right? right??
My strawberry 🍓 patch WITH decoys 😂
Worth a try and if nothing else I had a good deal of fun doing it.
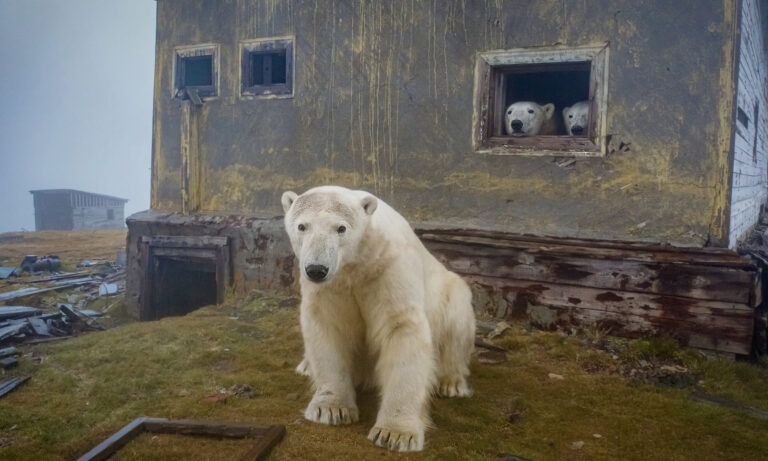
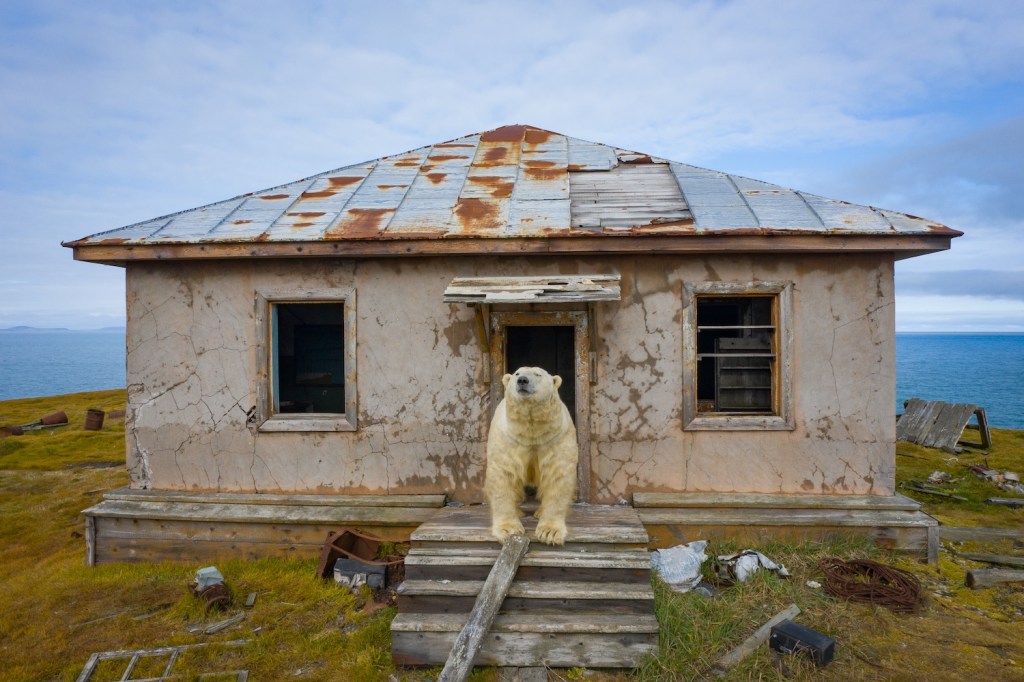
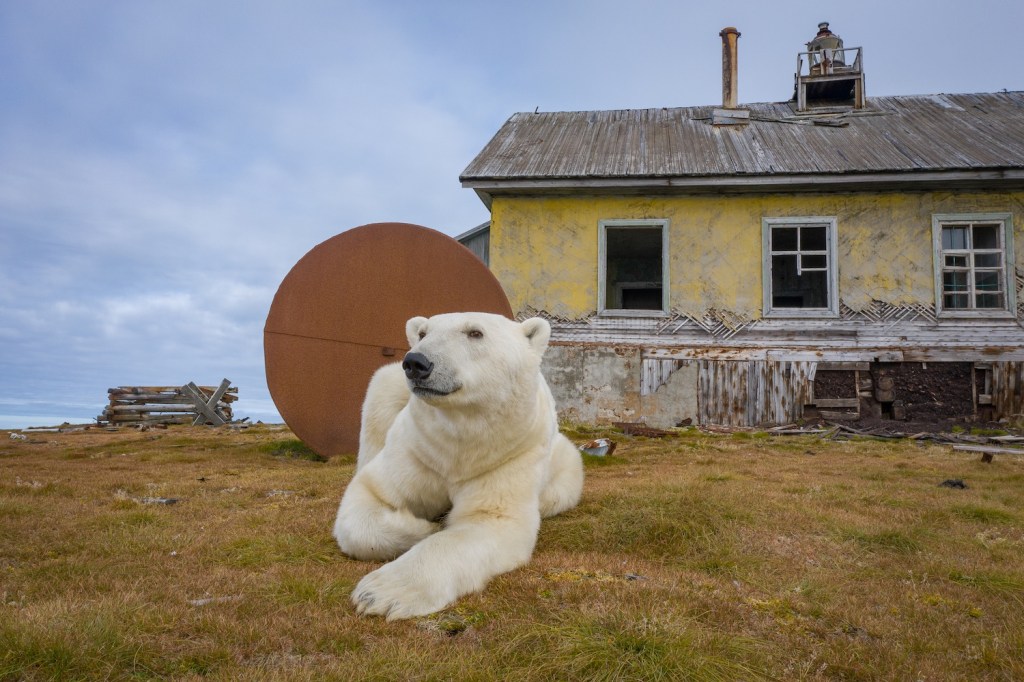
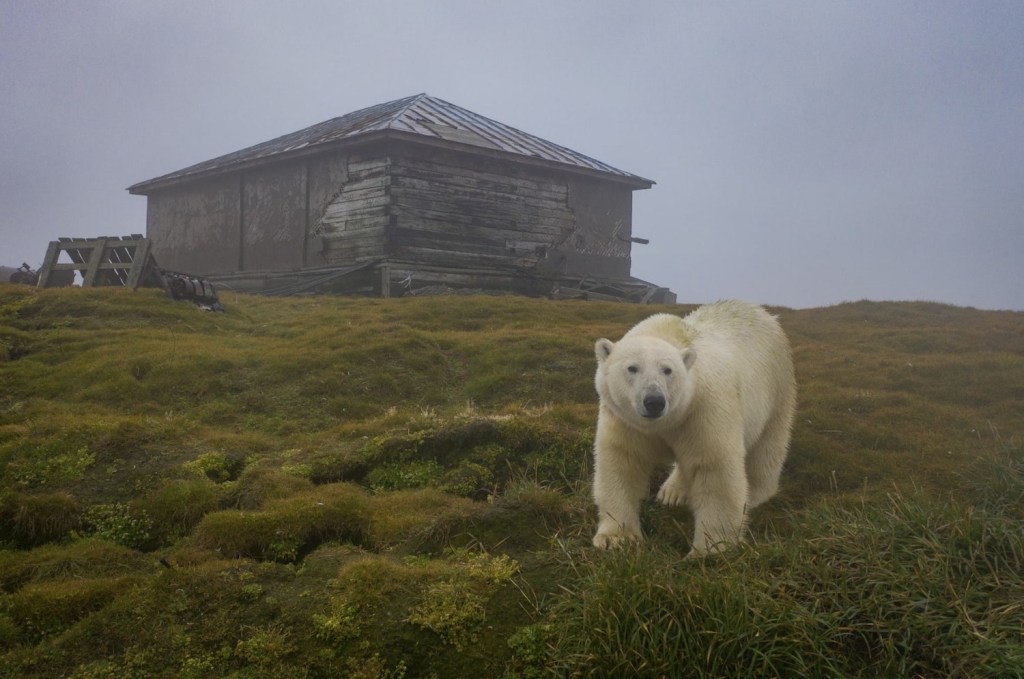
Like pale ghosts, a pack of white polar bears haunt a dilapidated, abandoned Soviet weather station on a small island in Russia’s Arctic far east.
This sleuth of spooky bears might have gone unnoticed on Kolyuchin Island had David Kokh, a 41-year-old Moscow-based photographer, not set sail on his long-awaited voyage to Wrangel Island last September. He shared how the remarkable encounter, and subsequent photoshoot of a lifetime, transpired.
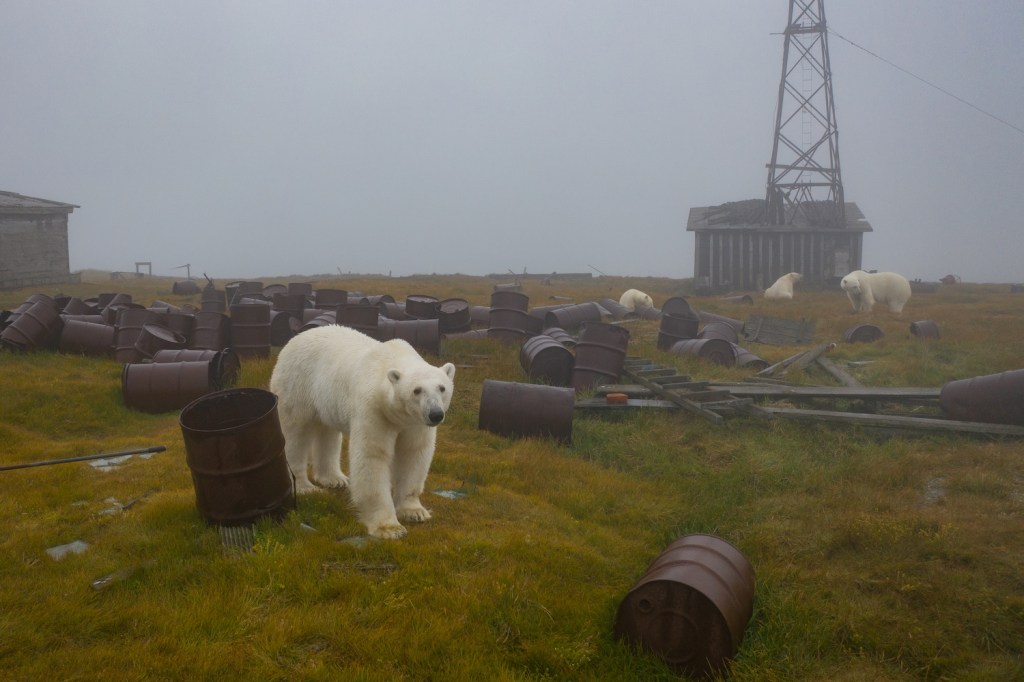
“We sailed along the coast and covered more than 1,200 miles of untouched landscapes, villages lost in time, spots with various fauna, and seas full of life,” Kokh told The Epoch Times. “One day, bad weather was expected, so our captain approached a small island, Kolyuchin, to take shelter from the storm.”
That Arctic island, located off Russia’s northeastern coast, northwest of the Bering Strait between Alaska and Russia, is known for its polar weather station that operated during Soviet times, the photographer said. It was finally closed in 1992, but an abandoned village still stands on the island today.
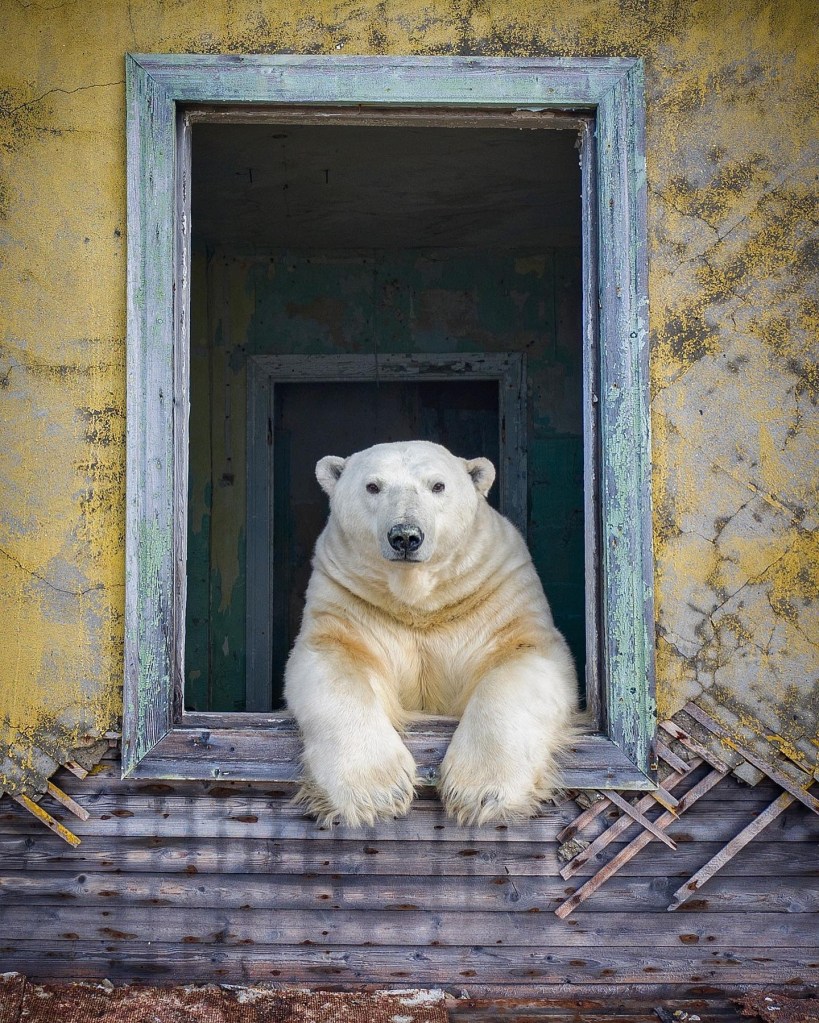
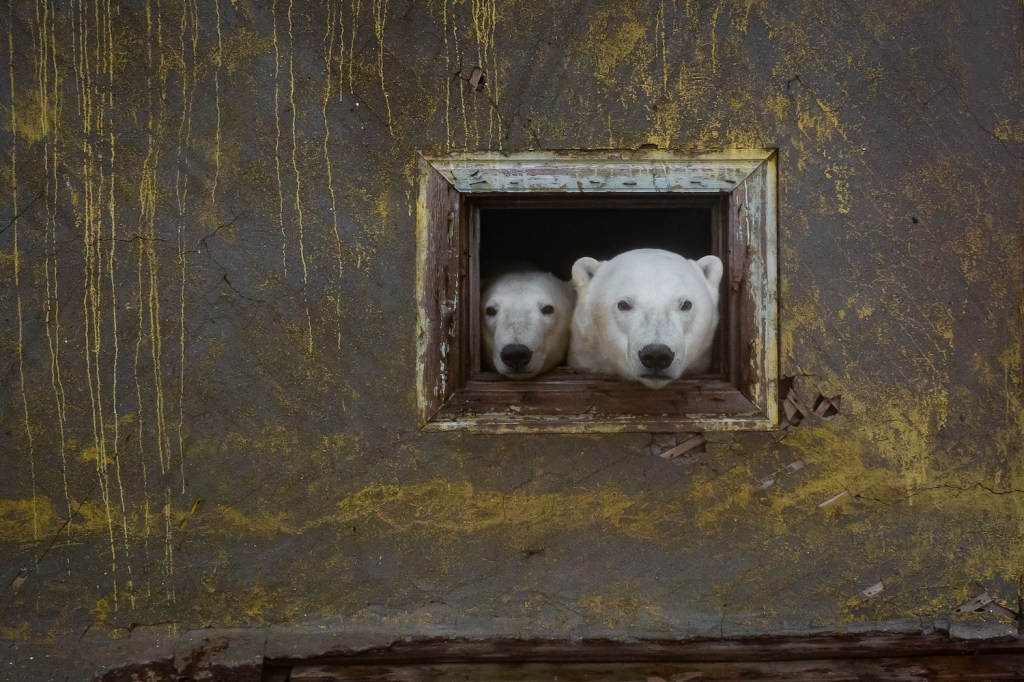
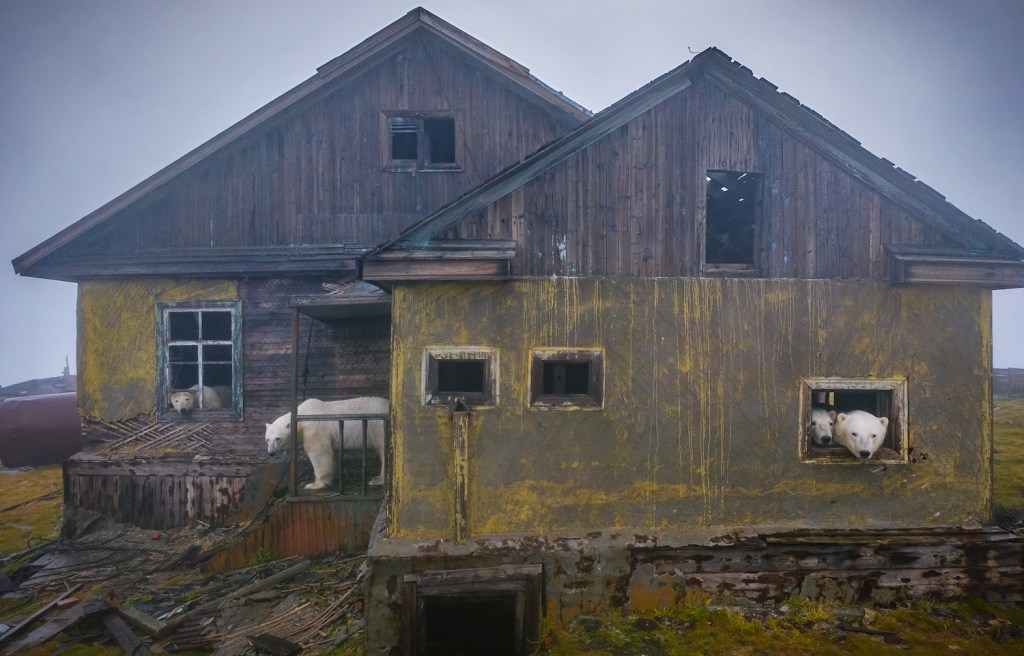
Kokh described feeling a “childlike sense of excitement” upon discovering the family of polar bears huddled amidst the dismal, depressing dwellings. “The stormy wind, rain, and neglected buildings on the rocky shores all made everything appear super surreal,” he said. “Suddenly, we noticed movement in the windows of the houses. Someone took out some binoculars and we saw the heads of polar bears!”
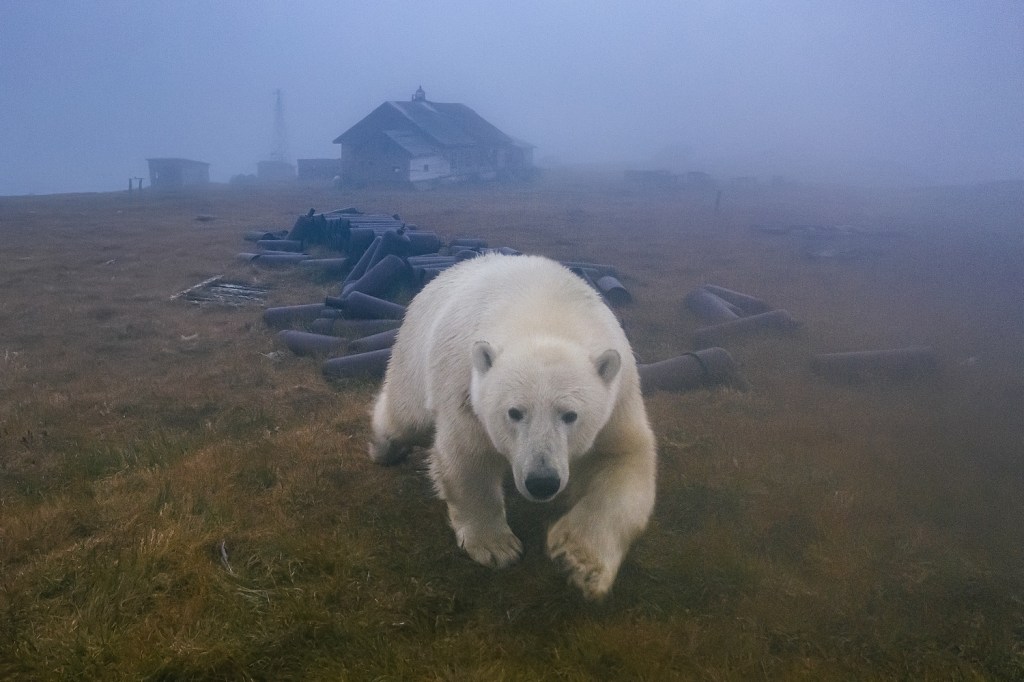
The bears appeared like wraiths amidst eerie fog on the long-deserted island. “It was the perfect setting,” he added.
Kokh was able to capture the wildlife on camera without disturbing them or exposing himself to danger by using his Mavic 2 Pro drone camera. The drone was equipped with low-noise propellers so as to not startle the enormous bears. He employed clever tricks and maneuvers with his drone to minimize the disturbance. “I was nowhere near them so was not in any danger,” he said.
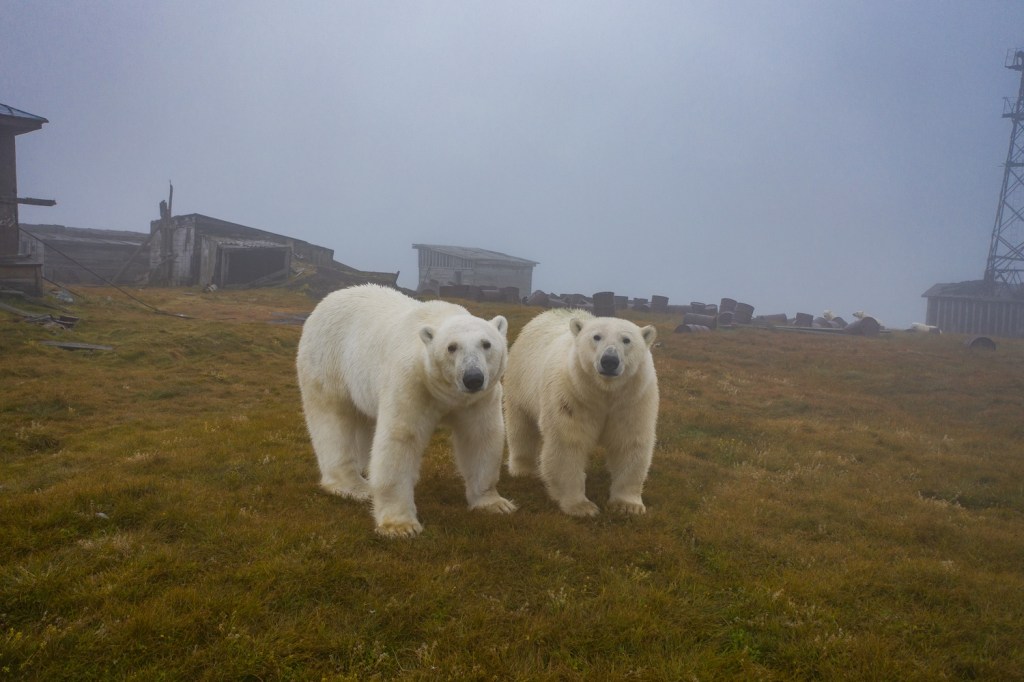
There were polar bears standing guard like sentinels; peering through windows, alone or in pairs; loitering on porches; and lounging on the lawns outside—making for a wildlife shoot of a lifetime. “The bears walked around the houses, there was about twenty animals in sight at the same time, mostly males,” Kokh said. “The females kept to the side with their cubs, closer to the shores of the island.”
Besides the thrill of the encounter and satisfaction of capturing a rare and unique moment, Kokh was able to share the polar bear photoshoot with the world on his Instagram, where it went viral. “The moment when I encountered the polar bears at the abandoned meteorological station in the Northern Chukotka was very special for me, pretty sure I will never forget it,” he said. “I’m incredibly grateful I can share this moment with people from all around the world.”
Kokh believes that a photographer’s job is to “tell a story”—His story, he adds, is one of the relationship between ourselves, wildlife, and nature.
Lots of steps to this so you’ll need an afternoon, but OH so WORTH IT.
The chicken will be falling off the bone tender.
Buffet Chicken Cacciatore
About half way done …
Goes back into the oven until sauce comes to a boil. Remove from oven. Remove the chicken, stir and place back into pan. Cover with foil and bake another hour.
★★★★★
Italian, Poultry
Servings: 4-6 servings
INGREDIENTS
Olive Oil
2 large onions — chopped
1 clove garlic
1 frying chicken, cut up
salt and pepper
2 28 oz. cans Italian plum tomatoes
1 teaspoon salt
¼ teaspoon pepper
½ teaspoon oregano
½ teaspoon basil
½ tablespoon thyme
⅛ teaspoon red pepper flakes
1 teaspoon sugar
1 bay leaf
1 green pepper — cut into strips
DIRECTIONS
Preheat oven to 350
Cover bottom of roasting pan with olive oil. Add onions and garlic. Brown lightly. Salt & pepper chicken parts and lightly brown.
Break up tomatoes, add sugar, red pepper flakes. salt, pepper, oregano, basil, thyme, & bay leaf. Mix well. Add green pepper . Pour over chicken and let come to a boil.
Remove chicken pieces, stir sauce and pour over chicken. Cover with foil and bake one hour.
Remove foil, increase oven to 450 & bake until chicken is delicately brown. Baste with sauce, and serve with small pasta.
I’m not sure why @chefsymon, the originator of this recipe, makes it outside on his grill BUT it made me want to try it.
Homemade Cream Cheese
Looks easy enough!
Prep Time: 15 min Cook Time: 20 hr 15 min Difficulty: EasyServings: Yield: 1 cup Source: foodnetwork.com
INGREDIENTS
1 quart (4 cups) cream or whole milk (or a mix of both)
One .05-ounce packet cream cheese starter
Kosher salt
DIRECTIONS
Set up your grill for low, even heat. If using a charcoal grill, distribute the coals evenly. If using a gas grill, heat both sides.
Slowly heat the milk/cream over low heat to 86 degrees F. Remove from the heat. Mix in the starter packet, mixing for no more than 15 seconds. Allow to sit at room temperature for at least 12 hours.
The next day: Ladle the solids into a cheesecloth-lined strainer set over a mixing bowl. Gather up the cheesecloth to cover the surface and refrigerate overnight, allowing the cheese to drain and firm up.
The next day, pick up the cheesecloth and pour the cream cheese into a mixing bowl. Season with salt and stir to combine. (If you’d like a firmer cheese, continue to press.)
This one’s from an old community cookbook. I’d made it years ago but had forgotten how good it was.
I’ve tried French Onion Soup recipes from Alton Brown, from the Barefoot Contessa and (gasp) the disgraced Frugal Gourmet, among many others. I wouldn’t have looked any further had I recalled making this version. Kick it up a notch by using bone broth if you’ve got it.
SO good. So EASY. So, what are ya waiting for, make it! 😎
Prior to adding the Parmesan…
French Onion Supper Soup
★★★★★
Soups & Stews, TRIED & TRUE
Difficulty: Easy Servings: 4
INGREDIENTS
3 large onions, thinly sliced
1 clove garlic, minced
1/4 cup butter
4 cups beef or vegetable stock (I used beef bone broth)
1/4 teaspoon pepper
4 thick slices of French bread
4 ounces Gruyère cheese, sliced
grated Parmesan cheese
DESCRIPTION
A delicious QUICK and EASY full flavored onion soup
DIRECTIONS
In a covered saucepan cook onions and garlic in butter over low heat 20 minutes or until tender; stir occasionally. Add stock and 1/4 teaspoon pepper. Bring to a boil, cover and simmer 15 minutes. Meanwhile, toast bread. Top each with sliced cheese; sprinkle with Parmesan. Broil 2 to 3 minutes or until cheese melts. Ladle soup into 4 bowls. Top with a toast slice and serve.
2 (6 to 8-ounce) jars imported tuna packed in olive oil, drained
½ cup (¼-inch) diced hearts of celery
½ cup minced scallions, white and light green parts (3 scallions)
3 tablespoons minced fresh dill
2 tablespoons freshly squeezed lemon juice
Kosher salt and freshly ground black pepper
¾ cup good mayonnaise, such as Hellmann’s
1 teaspoon anchovy paste (optional)
4 large slices bread, such as Pepperidge Farm Farmhouse Hearty White
4 ounces Swiss cheese, such as Emmentaler, grated
1 ounce microgreens
DIRECTIONS
In a medium bowl, flake the tuna finely with a fork. Add the celery, scallions, and dill, and continue mixing and fluffing with the fork until combined. Add the lemon juice, 1½ teaspoons salt, and ¾ teaspoon pepper. Combine the mayonnaise and anchovy paste, if using, and mix into the tuna.
Preheat the broiler. Toast the bread in a toaster and place the slices in a single layer on a sheet pan. Spread a quarter of the tuna mixture thickly and evenly on each piece of bread, covering the entire slice. Sprinkle the cheese evenly on the 4 sandwiches, covering the tuna completely. Broil for 1 to 2 minutes, just until the cheese melts and starts to brown. (Watch it carefully!) Sprinkle with the microgreens and serve hot.
🚨Full no-recipe recipe alert🚨 Speedy Fish Chowder: nyti.ms/2BGcxlP
Dice a strip or two of bacon if you’re a meat eater, or grab some butter if you are not (or use both if you are reckless). Add it to a Dutch oven set over medium-high heat and sauté with a few handfuls of diced onions, carrots and potatoes until the onions have gone translucent. Hit the mixture with some salt and pepper and a flash of smoked paprika if you have it. If you can find good corn on the cob, that would be a fine addition. So would a cup of frozen corn.
Do you have any fish stock? No? White wine? Surely you have water. Add enough liquid (of any combination of the above) so that the potatoes are almost swimming, then add a bay leaf and reduce the heat to a simmer.
Allow the chowder to bubble along until the liquid has reduced by a third and the potatoes are tender. Add a splash or two of milk or cream and allow it to heat and thicken slightly. Now cut the fillets into chunks and stir them in gently. Five minutes later: chowder. Serve with crusty bread.
How to evaluate based on symptoms, something I recently had to do for our adult disabled daughter. It can be a tense time to get it sorted out, as you just can’t walk in and be seen if your symptoms include a cough. I found this article to be very helpful and thought I would share it with you!
With fall allergies in full swing and flu season on the way, people may be wondering if that runny nose is just pollen attacking, a seasonal cold or flu — or if it could be COVID-19. You might be asking: When should I be seen? Should I be tested?
Symptoms That Can Overlap Cold, Flu, and COVID-19
Sore throat
Nasal congestion
Nasal drainage
Cough
Shortness of breath
Fever
Fatigue
Body aches
Loss of taste or smell
Abdominal symptoms
How to Distinguish Between Illnesses
COVID-19 unfortunately has all of those symptoms. The one symptom relatively unique to COVID-19 is loss of taste and or smell. But that only happens in about 60% of COVID-19 patients. If you lose your sense of taste or smell, COVID-19 is probably the most likely diagnosis.
Allergies usually start in mid-August and it’s usually something people have dealt with in the past. Allergies do cause a lot of histamine-like reactions, such as sneezing, itchy/watery eyes. It can cause a lot of nasal drainage and nasal congestion, so there is some overlap with COVID-19 and flu symptoms. The biggest difference is allergies shouldn’t cause loss of smell or taste. Also fevers and chills are not common for allergies.
Sinus disease tends to come on after 10 or more days of being ill, and it usually happens with green-colored nasal drainage, severe nasal congestion and tooth pain. You can also have chronic sinus disease but that wouldn’t be seasonal. That would tend to be year-round with chronic nasal congestion, smell loss and a lot of nasal drainage.
Strep throat usually begins with a sore throat and a fever. From there, you might have enlarged lymph nodes and sometimes a white coating on the back of the throat. There’s usually not a lot of nasal symptoms. Strep throat is treated with antibiotics, which lessens the duration of symptoms, lessens the chances of spreading it to others, and lessens some side effects like rheumatic fever.
RSV in infants and children usually begins with a fever or runny nose, some congestion and then develops into lower respiratory symptoms of cough, wheezing, difficulty breathing. In adults, RSV presents like any other cold you have had – some runny nose, congestion, a dry nonproductive cough.
Influenza is usually characterized by an abrupt onset of symptoms. The classic influenza patient says, “I felt fine until 3:30 this afternoon and then I felt like a bus hit me.” They develop body aches, fever, fatigue, congestion, sore throat and cough. Influenza can be treated in the first 48 to 72 hours with antivirals that can help shorten duration of symptoms.
What to Do When Symptoms Strike
With COVID-19 still in our area, it’s important to be seen and evaluated for these symptoms so you can be treated — and help prevent the spread of illness to your family, coworkers and the community.
These providers can assess your symptoms and determine if you do need to be tested and/or treated for allergies, flu, strep, COVID-19 – or something else.
Unless you have severe or life-threatening symptoms, avoid going to emergency rooms which can be overwhelmed with a lot of very sick people.
When in doubt about symptoms, it’s always better to be seen. Steps you can take for a healthier fall season include washing your hands, keeping your distance and masking in indoor public spaces and getting your COVID-19 and the flu vaccines.